This post is part of a series. You can find the previous parts about setting up Jekyll, transferring a domain name from Godaddy to Amazon Route 53, and how to theme a Jekyll site.
If you have followed along from the earlier posts you will have a website running locally using Jekyll. You will also have themed your website to make it look like you want it. The next step is to push the website to a web host so that the world can see it. Note that this series of tutorials is for those with a fairly new blog who are not interested in matching permalinks to a previous website. If you need to 301 content and have more friendly URL’s then more configuration is needed on Jekyll. I won’t cover this here just yet, but might in the near future.
In this guide I intend to show you how I deployed a static website on Amazon and enabled my domain name to be used on it. Because we only deal with html and Javascript, we can use the basic S3 static website hosting from Amazon Web Services.
Why Amazon?
The reason I selected Amazon was because of using many other hosts in the past such as MediaTemple (where this site was prior to the move to Amazon), WebSynthesis (where my DevFright.com blog is), PowerVPS, RackSpace, Rochen, Blue Host, Host Gator, Linode, Digital Ocean to name a few. I wanted to try Amazon so I could see first hand how that performed. I was also intrigued on how they charge for hosting there. Unlike a mostly flat fee of the ones mentioned above, I wanted to see what it actually costs to run a blog when I pay for what I use rather than pay up front.
One thing to note as well is that I have all my blog content locally, and can switch hosting providers within an hour if needed.
Setting up a Website on Amazon
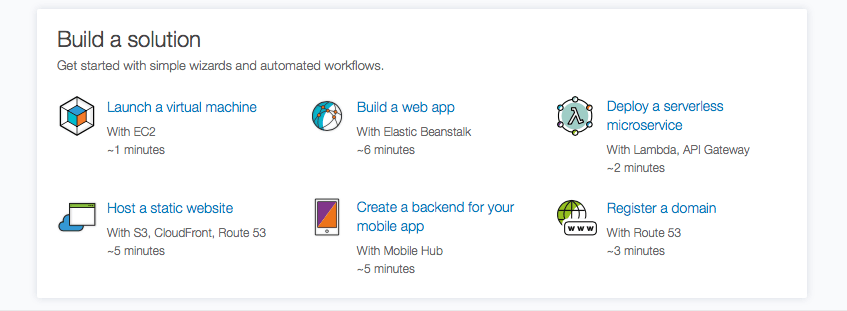
Amazon makes it really simple to setup a website with them. To do this, visit Amazon Web Services and login with your Amazon account (or create an account if you don’t use Amazon). When logged in you will see an option in the "Build a solution" section called "Host a static website". Select this option as below:
Click on the + New website button. You can’t miss it.
Give your website a name. I just put mine as Matthew Newill Blog. I opted for the example website and then clicked "Create Website".
The website is set up and you are given a sub domain to use. Of course, you might and probably will want to use your own domain. Lets set that up next. If you are running a live blog and don’t want any downtime I suggest you do this step last and just work with the provided sub domain until you are happy that everything is set up as you want it.
Transferring a Domain to Route 53
I transferred my domain name from Godaddy to Route 53. To do this I first needed to unlock the domain at Godaddy so that a transfer request could be made. You do this by logging in to GoDaddy and then going to the option to manage your domains. You then select your domain (the checkbox next to it) and at the top you’ll see a "Lock" button. Click on this and switch the lock off.
Then select the domain name so you can see its details. In that screen scroll to the bottom and select "Email my code" next to the Authorisation Code heading. A code will be sent to you. Hold on to this.
Log in to AWS and go to Route 53. Select the option (link just above where you register a domain) and click "Transfer your existing domains". If you have unlocked your domain you should be able to just proceed to transfer to Route 53. At some point you need your authorisation code. To speed up the transfer, this is what I did on Godaddy.
When the transfer is completed (it may take a few days if you are unable to speed up the process as above) then go back to the website you just created on the previous step. Click on "Buy Domain" and on the next screen, choose an existing domain. Click on "Associate Domain".
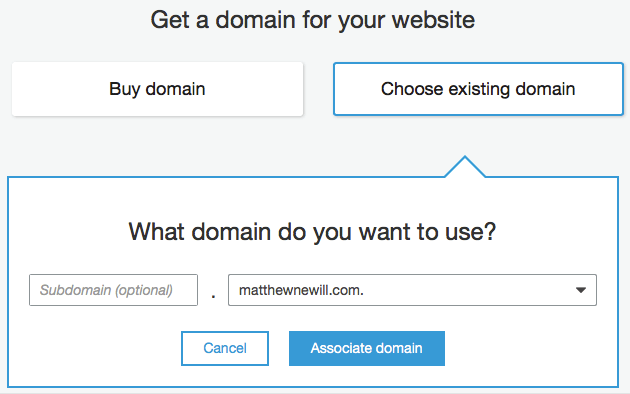
At this point, you need to wait about 15 minutes for the process to complete which associates your domain with your website.
Configure the Content Delivery Network
Now that you can load up your empty website in the browser on your own domain name, lets take at look at configuring CloudFront. To do that, click on "Manage settings in Amazon CloudFront".
In the general tab I clicked Edit and then added my domain name to the "Alternate Domain Names (CNAMEs) section. I also switched to HTTP/2, HTTP/1.1, HTTP/1.0.
When done, CloudFront is ready although you can make other alterations as needed. For example, I created an SSL certificate and added that in the CloudFront general settings tab.
Transferring Your Jekyll Site to Amazon
At this point, you could build your Jekyll site and then upload the site folder in to Amazon S3. Thankfully though, someone has created a tool that can push your site to S3 by issuing a terminal command. The setup takes a few minutes, but once done, you just need the command "s3_website push" to push any changed content to Amazon S3.
Lets set everything up. Open terminal and get to the root of your Jekyll install. Install with:
gem install s3_website
You need to generate the config file next. Do that by issuing the following command:
s3_website cfg create
A new file called s3_website.yml will appear at the root of your Jekyll install. Open this in your text editor of choice.
At the top you will see some items that need configuring such as the S3 ID, secret, bucket and cloud front distribution. This information acts somewhat like (but not really like) a username and password so that it can get content in to your S3 bucket. It also highlights where to put that information. If you generate an id and secret that is granted access to the bucket and CloudFront distribution, then s3_website will be able to upload your content.
To get this information, visit the aws console and login. Search for IAM and load it up.
On the left sidebar, select Users and then click the blue button called Add user.
Provide a username, and then select "programmatic access".
Click Next to get to the permissions.
Select "Attach existing policies directly".
Search for AmazonS3FullAccess and add it. Then search for CloudFront and add CloudFrontFullAccess. Be warned here that this gives this particular user access to all S3 buckets and the CloudFront console. For me, this is OK right now because this is all I have in my account, but please do be careful when granting access here.
Copy the Access key ID in to the s3_website.yml file and then copy the secret access key in to the same file.
Go back to the main view in the AWS console and load up S3. Here, you need to find your S3 bucket name for your website. It will be in the format of: awe-website-yourfriendlyname-xxxxx
Paste that in to the config file.
Finally, you need the CloudFront distribution ID. You get this by going to your static website settings, selecting your site, clicking "Manage settings in Amazon CloudFront" and then at the top of the page you will see:
CloudFront Distributions > EXXXXXXXXXXXXXX
Save the config file.
In the terminal run the following command:
s3_website cfg apply
If all OK, read on to find instruction on how to push the website to Amazon.
Uploading Your Website
Now that everything is confirmed and validated as working, it’s time to issue the correct comments.
Issue:
jekyll build
Check for errors. If all OK, issue:
s3_website push
Wait a few moments and when complete, load up your website at yourdomain in the browser to see if all works. If so, well done! You now have a fully working Jekyll install that you can push to the internet.
Each time you write a new post you need to build it and then push it. If you are more wise than I am, you might also want to test the site locally before pushing to ensure that all works well.