In 2020 I swapped from primarily doing iOS development to doing some backend PHP work for several months where I used a custom microservices framework and then switched to Lumen, and then to Laravel, and then integrated GraphQL with Lighthouse to make backend APIs for a couple of different projects. It was all good fun for those months, but I’m now back to what I enjoy most which is iOS app development.
With SwiftUI launching at WWDC in 2019, I didn’t get to spend much time using it other than running a few tests to see what it was like and becoming familiar with Text, VStack, HStack, and various other views. I liked it in 2019. It was only this year, 2021 when I decided to pick up on it again more seriously.
What I have found so far is that SwiftUI is great at some things, but introduces new challenges of breaking away from the traditional way of structuring a program. In the past, I structured my projects so that the ViewController contained just enough code to handle putting information on the view and responding to touches. The logic was separated into business objects which then communicated with various models. This allowed for the logic of the app to be reused elsewhere in the app and not be tied to a single view.
To get more familiar with how SwiftUI works and how it works in an app environment I have started creating a test app to work out what works well. One good example I found from Apple is the Fruta test app that utilises a three-column layout, state objects, nested SwiftUI views, models, amongst other things. Although I won’t be using the three-column layout for my tests, I will be using the other things mentioned, but I won’t really be mentioning what I’m using specifically in this post. I simply wanted to mention Fruta because it’s a great example from Apple.
App Life Cycle
The latest version of SwiftUI uses a new app life cycle which it is termed as a SwiftUI App. If you are not new to Swift then you will be familiar with the UIKit App Delegate. You can actually still select the latter of these, although I want to do my tests with the new SwiftUI App life cycle.
With the older app delegate your project gets an AppDelegate.swift file as well as a SceneDelegate.swift file. AppDelegate handles launching the app and receiving notifications, but SceneDelegate then came along and handled the views, such as for iPadOS apps which can be launched twice in a split screen.
With a SwiftUI App life cycle, you get the following:
import SwiftUI

@main
struct YourApp: App {
    var body: some Scene {
        WindowGroup {
            AppTabView()
        }
    }
}
@main is an attribute that indicates that this is where everything starts. You can only have one @main in your program.
Following @main you get a structure that conforms to the App protocol that has a body containing a Scene, and then a WindowGroup where you can put the name of your “main view”. In the example above I decided to start in AppTabView() which is a custom SwiftUI structure that puts a tab view on the screen.
This is pretty much the smallest you can get this beginning file. If you opt for using core data in the setup template, you also get a persistence controller singleton included, but I haven’t looked into how that all works just yet. A lot of it looks familiar, but I haven’t spent the time piecing it together. Later on, in my test app, I will be using CoreData, so will add that in manually later and investigate how it works best in SwiftUI. I also want to look at how to handle push notifications and other things that a typical AppDelegate would handle.
AppTabView Structure
AppTabView is what I am calling what what have been called in Storyboards an initial view. I created a new SwiftUI file and called it AppTabView and then put the following code in there:
struct AppTabView: View {
    var body: some View {
        TabView {
            TodayView()
                .tabItem {
                    Image(systemName: "calendar")
                    Text("Today")
                }
            SettingsView()
                .tabItem {
                    Image(systemName: "gear")
                    Text("Settings")
                }
        }
    }
}
In this example, we declare a struct called AppTabView which conforms to the View protocol. This requires a body is returned that is some View, some meaning that we don’t know what kind of view that is being returned, and it doesn’t really care as long as it conforms to the View protocol. This is called an opaque return type. Only one view can be returned. We cannot return two views. What can be confusing is that it looks like nothing is returned. I’ll try to explain that now:
var body: some View {
    Text("Hello!")
}
This would return a Text view containing a string Hello!. Opaque return types do not require we use the return keyword, but we could write it as follows if we wished. Having another return in there would clearly not be right. I hope this illustrates why we only return one view.
var body: some View {
    return Text("Hello!")
}
If you look at the AppTabView I put above, you might notice that many views are being returned. You can see a TabView, a TodayView and a SettingsView. Thankfully SwiftUI allows you to nest views within views. Ultimately, the outer TabView is what is being returned and some code underneath knows how to handle views nested in views. Nesting views will be a big part of SwiftUI from what I have seen and greatly helps to break up a program into manageable chunks.
If you try running the example code above you’ll get an error saying that it doesn’t know what TodayView and SettingsView are. We still need to define those. The TabView is known because that is a built-in view that allows us to quickly declare what was previously known as a TabViewController.
Just before showing TodayView and SettingsView, I best show what I have learned about the TabView.
TabView {
    TodayView()
        .tabItem {
            Image(systemName: "calendar")
            Text("Today")
        }
    SettingsView()
        .tabItem {
            Image(systemName: "gear")
            Text("Settings")
        }
}
The TabView is documented well at Apple which has a very simple example. In this small bit of code above, we have two tabs. The view we will use is held in a SwiftUI file with a struct called TodayView(). We declare it’s a tabItem with the .tabItem, and then nested in that property is the image to use (we use a built in image called calendar), and some text which will render underneath that icon which says “Today”.
The second tab will open a view called SettingsView() and will use a gear for an icon and have text under that called Settings.
Creating the TodayView
I created a SwiftUI file called TodayView.swift and modified it to show the following:
struct TodayView: View {
    var body: some View {
        VStack {
            HourlyStepsView()
        }
    }
}
The outer view which is what we return is a VStack which is a built-in view provided by Apple. A VStack allows you to stack views vertically, one on top of another. In the example above we only declare a single view called HourlyStepsView(). If we wanted we could add in a Text view below or above it (but still within the VStack), and an Image view and a custom view, or whatever view we want. These will be ordered on the screen in the order they are listed in the VStack.
Creating the HourlyStepsView
Everything so far has been fairly simple. We started off with our App in YourApp. This instructed that the initial view was AppTabView. AppTabView contains two tabs, one of them being a TodayView. We created a TodayView and in there put a VStack with another custom view called HourlyStepsView. We are now at a point where we can create the HourlyStepsView.
If it isn’t clear already, this first exercise I am practising is to create a very simple pedometer app. The TodayView will have more layout added such as a total number of steps, the number of flights climbed and descended, the distance walked so far today and the HourlyStepsView which will show how many steps per hour have been taken. I will revisit that view later after adding in the hourly steps.
I think this is what makes SwiftUI great. We can break up our view code into smaller chunks. Rather than trying to spend time adding complex view layouts into a single struct, we can pack smaller sections into their own views and then nest them when needed. It also makes re-using code for our views possible. It also makes updating a nested view very easy. Perhaps we want to change the look of our chart. If the chart is it’s own contained view, we simply edit that and anything changed there will be reflected when it is used elsewhere in the app.
What if I was to add another tab called History that showed hourly step counts. If I would have put all of that view code into the TodayView, I would then need to copy and paste the code into the HistoryView. This isn’t a good idea if code can be re-used. Instead, we put it in its own struct and then we just provide it with the data we need, whether that be the hourly step count for today or the last 30 days of step counts.
To create the chart for displaying steps each hour I decided to use the iOS Charts package from this GitHub repo for three reasons. First, I’ve worked with it before in a Storyboard based app and liked it, second, I wanted an excuse to use the Swift Package Manager, and third, I wanted to look at how to use UIKit with SwiftUI.
To work with the package manager you go to File > Swift Packages > Add Package Dependency… You then paste in the GitHub repo URL. When this had been verified, I then set it to use the master branch and then hit Next. After a minute or so you will have the option to select Charts or ChartsDynamic. I say “OR” because if you select both it wont work. I selected Charts and hit Next. After a few moments it will complete and you will then have the ability to use iOS Charts in your app.
Here is the code I managed to pull together to make it work:
import SwiftUI
import Charts

struct HourlyStepsView: UIViewRepresentable {
    let chart = BarChartView()

    func makeUIView(context: Context) -> BarChartView {
        configureView()
        chart.data = stepData()
        return chart
    }

    func updateUIView(_ uiView: BarChartView, context: Context) {
        uiView.data = stepData()
    }

    func stepData() -> BarChartData {
        var values: [BarChartDataEntry] = []
        var colours : [UIColor] = [UIColor]()
        for index in 0...23 {
            let steps = Double(Int.random(in: 0..<2000))
            let value = BarChartDataEntry(x: Double(index),
                                          y: steps)
            values.append(value)
            colours.append(set24HourColor(value: steps))
        }

        let set = BarChartDataSet(entries: values, label: "Today")
        set.colors = colours
        let data = BarChartData(dataSet: set)
        data.setDrawValues(false)
        return data
    }

    func configureView() {
        // The chart will be configured for how it looks here.
    }

    func set24HourColor(value: Double) -> UIColor {
        // Logic here to change the bar colour based on value.
    }
}
Notice that the import imports Charts. We then create a view that conforms to the UIViewRepresentable protocol. I am not fully comfortable with UIViewRepresentable yet and need to look into how the coordinator works. I’ll address that in another post.
After declaring the struct I created a constant called charts that is a BarChartView from the charts package. The configureView function is where I set properties such as chart.chartDescription.enabled = false. If this view would be used in multiple places, I would probably not handle the looks of the chart within the view because a different view might want it to look a little different.
func makeUIView(context: Self.Context) -> Self.UIViewType
Next, I declare this method which is required by the UIViewRepresentable protocol. Here I configured the look of the chart, as mentioned earlier, and then provide the chart with some data (in this case, 24 bars with random ints between 0 and 2,000 as seen in the stepData function I created), and then I return the chart.
One final step is to add in the updateUIView method that is also required by protocol. In this method I just set the views data to the current step count.
When completed, with the configureView and colour code added I now see the following in the preview:
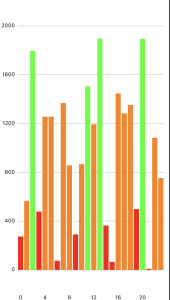
When refreshing the preview the bar values alter in a random way.
Final Thoughts
I feel I have made a good start to SwiftUI. Most of this I understood already from previously looking at it such as VStacks, nesting views, Text, and many of the basic views that I haven’t mentioned here, but what I am learning is the App life cycle, using UIKit views with SwiftUI, and next will be moving on to state and observable etc…, but this proved to be a valuable test to really try understand what is going on under the hood. I have a bit more of a way to go before being able to make good solid apps with SwiftUI, but it’s clicking into place nicely.
My next challenge which I will write about soon is the coordinator I mentioned for the UIViewRepresentable protocol. I need to read up more about it to see what is required and how it works and what it does. It is explained in the documentation, but I feel I need to research it more and see it working in practice to understand it.
After that, I will look at how best to get the step data and how to work with models in a good way. This current version has all of the step data randomly created within the view itself. This is incorrect, although good enough for a test to get a chart working. I want the step data to come from CMPedometer as well as HealthKit for older data. I already wrote about CMPedometer on my iOS blog, but SwiftUI seems to work with data differently and I want to work out how to fit it all together in a good pattern to make it work.
Any questions, please post below. If you want the full working code then let me know. It’s a bit messy still while I am in testing and learning mode, but am happy to post it below if needed.